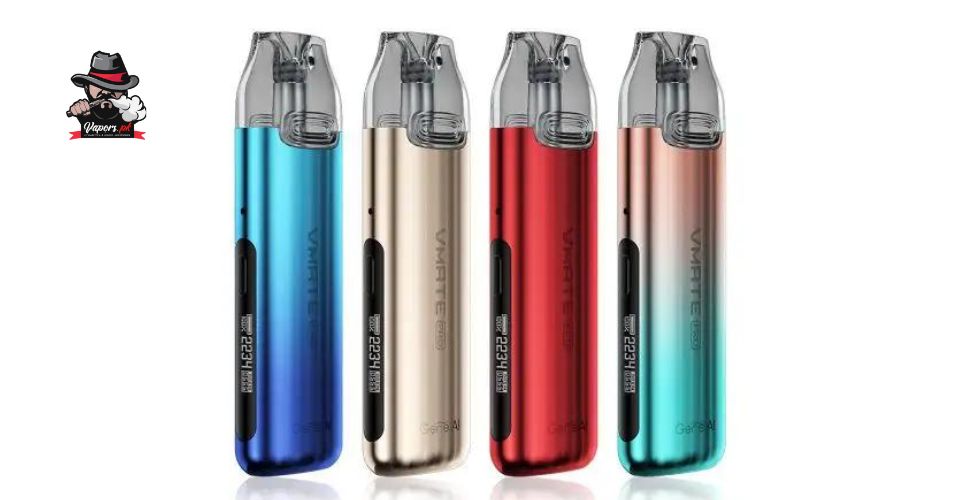
The Vmate Pro by VooPoo is a sophisticated and versatile vape mod that offers an exceptional vaping experience for both beginners and seasoned enthusiasts. With its sleek design, advanced features, and user-friendly interface, the Vmate Pro is the perfect choice for vapers looking for a reliable and customizable device. In this comprehensive guide, we’ll walk you through the step-by-step process of vaping with the Vmate Pro, from setup to maintenance, to ensure that you can enjoy a seamless and satisfying vaping experience.
Unboxing and Setup
1. Unboxing
Start by unboxing your Vmate Pro kit. Inside the box, you’ll find the Vmate Pro mod, a USB charging cable, user manual, and any other accessories included with your kit.
2. Battery Installation
If your Vmate Pro requires external batteries, insert them into the battery compartment according to the polarity markings. Ensure that the batteries are inserted correctly to prevent damage to the device.
3. Power On/Off
To power on the Vmate Pro, press the fire button five times rapidly.
Adjusting Settings
1. Wattage Adjustment
The Vmate Pro features adjustable wattage settings to customize your vaping experience. Choose the wattage that best suits your preferences and coil resistance.
2. Temperature Control (TC) Mode (If Applicable)
If your Vmate Pro supports temperature control mode, you can adjust the temperature settings to fine-tune your vaping experience. Press the mode button to enter TC mode, then adjust the temperature using the up or down button.
3. Coil Recognition
When attaching a new atomizer or coil to the Vmate Pro, the device will automatically detect the coil resistance and recommend a wattage range for optimal performance. Follow the device’s recommendations or adjust the wattage manually as desired.
Filling the Tank
1. Remove the Tank
To fill the tank, first, remove it from the Vmate Pro mod by unscrewing it from the device.
2. Fill with E-Liquid
Locate the fill port on the tank and open it. Fill the tank with your favorite e-liquid, taking care not to overfill. Once filled, close the fill port securely.
3. Prime the Coil (Optional)
If using a new coil, it’s recommended to prime it before vaping to ensure optimal flavor and coil longevity. Apply a few drops of e-liquid onto the coil’s cotton wick and allow it to saturate for a few minutes.
4. Reattach the Tank
Once the tank is filled and the coil is primed (if necessary), reattach it to the Vmate Pro mod by screwing it onto the device.
Vaping
1. Prime the Coil
Before taking your first puff, it’s essential to prime the coil to ensure optimal flavor and vapor production. To prime the coil, take a few short puffs without pressing the fire button to draw e-liquid into the coil’s wick.
2. Adjust Settings as Needed
Throughout your vaping session, you may choose to adjust the wattage or temperature settings to fine-tune your experience. Experiment with different settings to find the perfect balance of flavor, vapor, and throat hit.
3. Press the Fire Button
Once the coil is primed and settings are adjusted, press the fire button while inhaling to activate the device and begin vaping. Take slow and steady draws to enjoy the full flavor and vapor production of your e-liquid.
Maintenance
1. Refilling the Tank
When the e-liquid level in the tank becomes low, refill it with your favorite e-liquid following the steps outlined earlier in this guide.
2. Coil Replacement
Unscrew the old coil from the tank and screw in a new one, ensuring that it is securely seated.
3. Cleaning the Device
Avoid using water or harsh cleaning agents, as these can damage the device.
Mastering vaping with the Vmate Pro is a straightforward process that begins with unboxing and setup and continues with filling the tank, adjusting settings, and enjoying your favorite e-liquids. By following the step-by-step guide outlined in this comprehensive overview, you’ll be well-equipped to get the most out of your Vmate Pro mod and enjoy a satisfying vaping experience every time.


